

Introduction to Docker, with a Nodejs Demo

The process of developing applications involves more than just writing code. Beyond selecting what language or framework to use, other factors come into play― development environment, dependencies, architecture, etc. If these factors are not taken into consideration, building and deploying a product could be painful.
What is Docker?
Docker is a development tool that allows a developer to package all the dependencies, libraries, and possible configurations into a single package that can either be shared as an image (Docker image) or deployed as an instance called a container (Docker container).
Why Docker?
In a team of developers, each individual could have different operating systems which could affect how a package behaves. In a project with multiple stack components, each component could require different versions of the same dependency package. The development environment (operating system), could be different from the production environment (operating system). Consistency can be very difficult to attain while developing a product. But with Docker’s ability to package dependencies, configurations, and other specifics into an isolated docker instance, the different components of a product can be configured separately, differences between development environments and production environments can be ignored, and the age-long excuse of “But it works on my laptop!” can be avoided.
Definition of Terms
To fully follow this article, and appreciate Docker better, it is important to understand some of the concepts.
Virtualization and Virtual Machines
Virtual machines are computers running on computers. The process that makes creating virtual machines possible is called virtualization. It is also the concept on which containerization (creating containers) is based.
Virtual machines have CPUs, memory, storage, operating systems, and the ability to run applications. But as the name implies, the hardware that makes up a virtual machine is not tangible. They are software-defined allocations from a larger pool of physical resources.
The diagram below represents how virtual machines can be visualized.
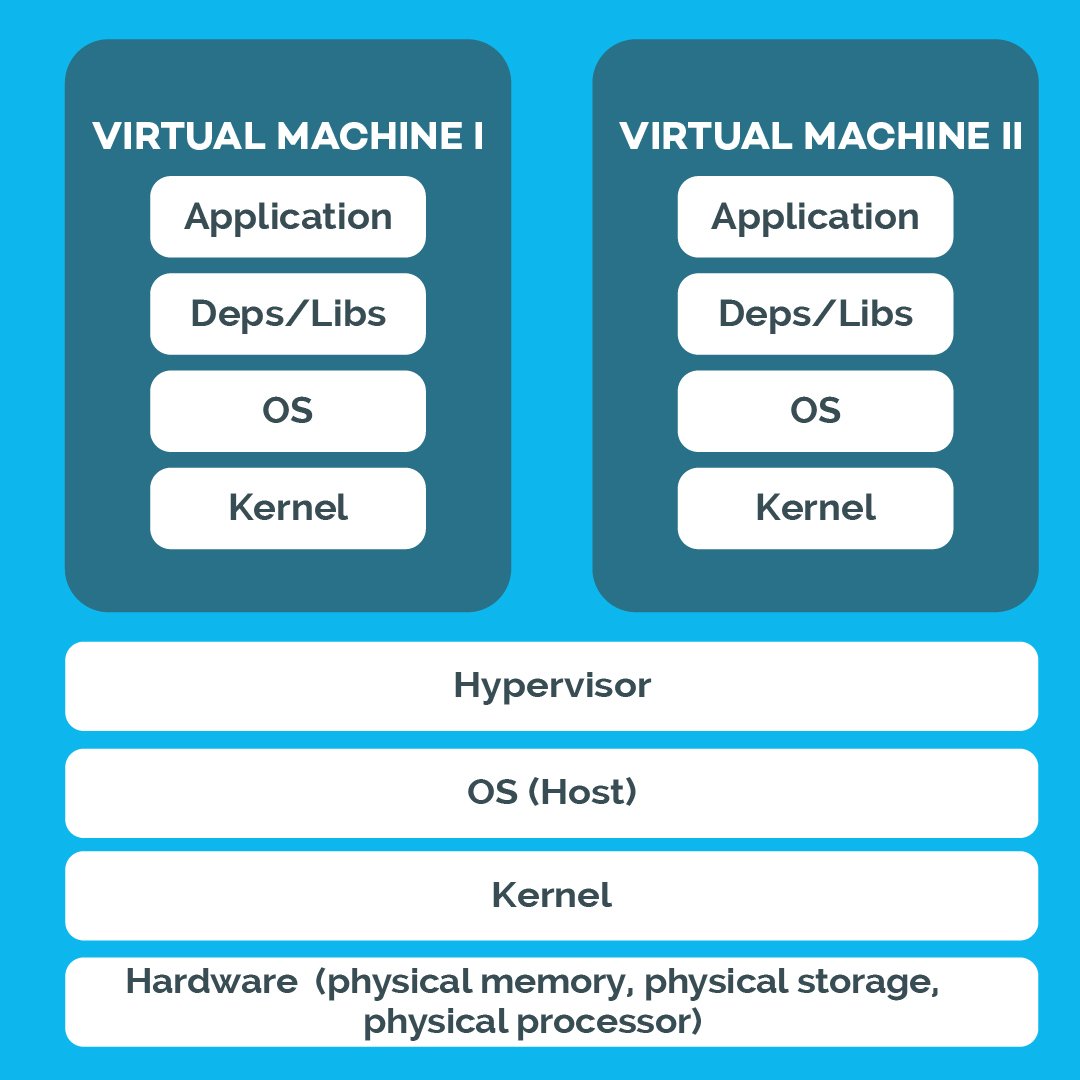
From the diagram, the host, which has access to all the physical resources (hardware), runs a software called a hypervisor. The hypervisor is responsible for creating and managing virtual machines. For every application to be run in its isolated environment, a new virtual machine has to be spun. This would have its operating system with its resources allocated to it, whether it is in use or not. This, depending on the reason for setting up the VM, could be wasteful in terms of resources.
Note: The Kernel is a piece of software that interfaces the OS with the hardware.
Containerization and Docker Containers
Containers, in a way, are similar to virtual machines. They can be used to provide an isolated environment of processes, services, network interfaces, with all the libraries and dependencies needed for an application to be developed, or deployed to run consistently on any platform. They are lightweight, portable, and fast. They can be used as either alternatives to or in addition to virtual machines.
The image below describes a docker container.

While they are similar to virtual machines, containers have features that separate them from virtual machines. Since Docker containers share the same kernel of the host, all containers must be based on the same kernel of the OS.
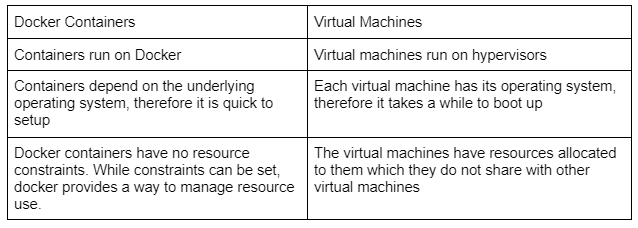
DIFFERENCE BETWEEN DOCKER CONTAINERS AND VIRTUAL MACHINES
Docker Images
A Docker image is a template that contains the application code, libraries, configurations, and other dependencies that a Docker container would contain when it is created from a given image. A Docker image can also act as a base image on which more dependencies and code can be added to create another image.
Since it is simply a template, multiple instances (Docker containers) of the image can be created on a host machine.
Docker Registry
A Docker registry is a repository for the storage and distribution of Docker images. Docker registry allows users to "pull" (copy from registry), or "push" (copy to the registry) Docker images.
Docker repositories are hosted as server-side applications and can be private or public. There are open-source Docker registries that can be customized if need be, and set up for use. Docker has an official docker registry called "Docker hub".
Docker Hub
Docker hub is the official registry for Docker. It is the largest collection of Docker images. Docker Hub has official images curated by Docker that provide a reliable base from which Docker containers for a particular purpose can be created, or other docker images can be built upon.
Docker hub offers a lot of other features including creating private repositories. You’d have to sign up to enjoy full benefits.
Dockerfile
A Dockerfile is a text document that contains the instructions needed to build an image. There are syntax and keywords needed to write a functional Dockerfile. We will be looking at some of them later in this article.
Docker Compose
An application may require running multiple containers. Docker compose makes that possible. (While exploring “docker compose” is out of the scope of this article, it shall be covered in another article.)
Setting up Docker on Windows
In this section, we shall be going through the process of setting up Docker on Windows.
To use Docker on Windows, some requirements must be met.
- A 64-bit operating system must be installed
- Minimum of 4GB installed RAM
- Virtualization must be enabled in your laptop’s BIOS (the process to enable this varies between products, ensure to check with your product’s manufacturer)
Follow these steps to set up Docker:
- Download the Docker desktop application here.
- Run the installer.
- During the installation, you’d be prompted to enable the Hyper-V Windows feature. Ensure you do so.
- Follow the rest of the installation process till the end.
- Once the installation is done, start the Docker desktop application.
You might be prompted to update the WSL 2 Linux kernel. Follow the link highlighted.
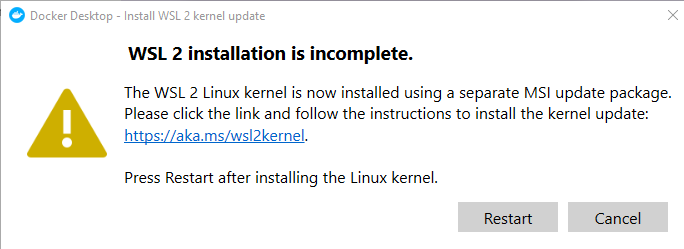
When the page loads download the WSL2 Linux kernel update package, run it, then click the restart button in the previous update prompt


Quick note: To run Linux-based docker containers on windows, a Linux virtual machine would be spun. The Docker containers will run on them. This is why we need the kernel.
Guide to Dockerizing a Basic Nodejs Server.
To demonstrate how to use docker in this article, we shall be writing then dockerizing a Nodejs(express.js) server.
Creating a Node Server
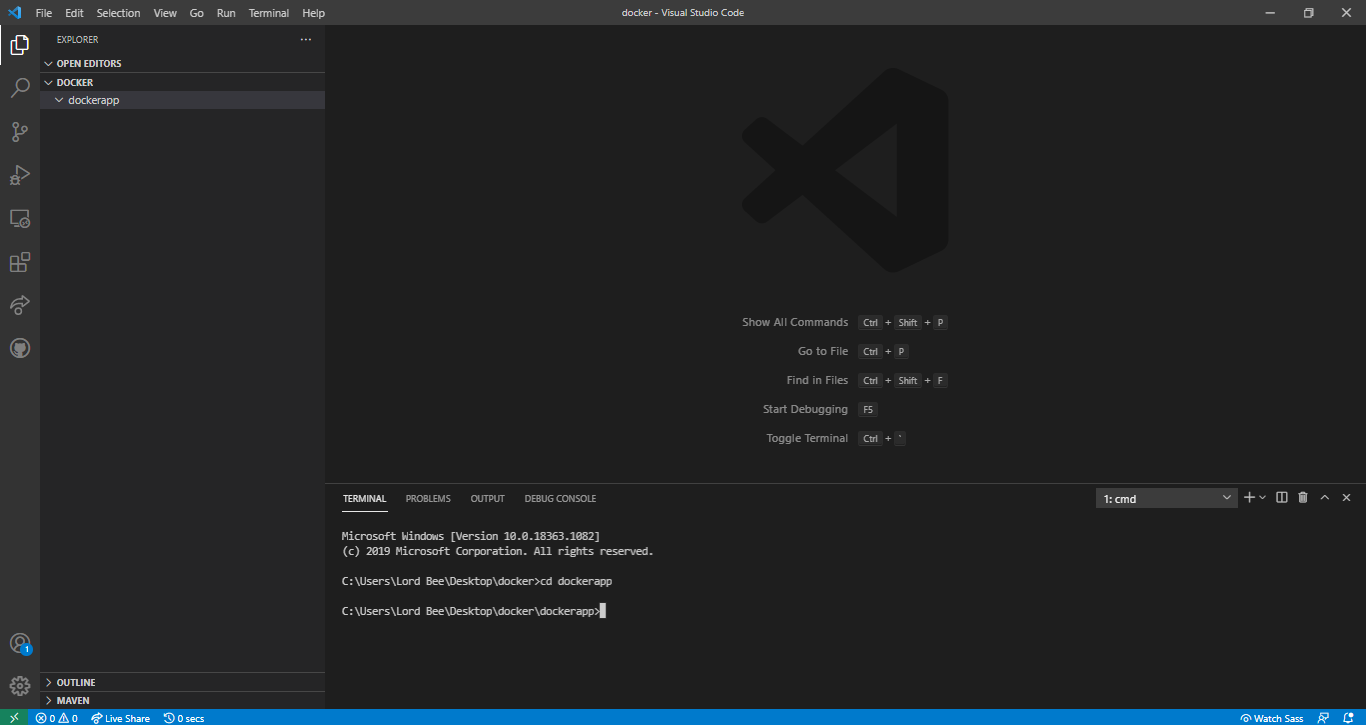
Create a folder in the working directory
First, you create a folder called “dockerapp” in whatever directory you are, and move into the folder directory as shown below.
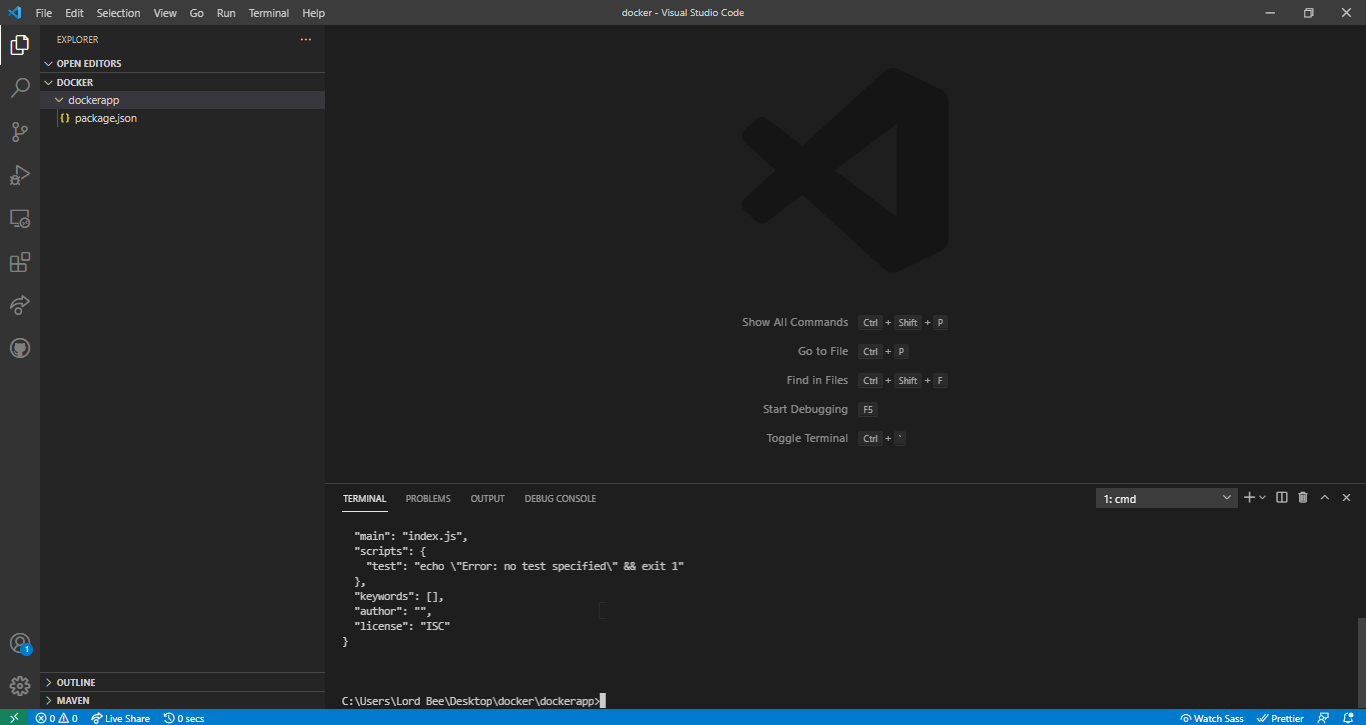
Initialize the package.json with the Node Package Manager(NPM)
This would contain the nodejs server information and list of dependencies. To do this, type the line below in your terminal:
$npm init -y
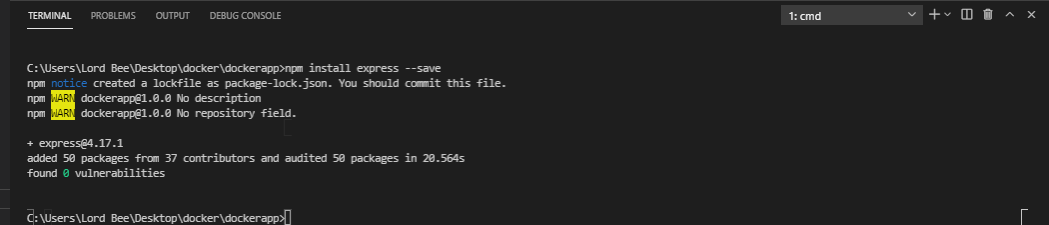
Install express.js
Next, we install the express.js framework that would be used to create our server.
Copy the code below into your terminal.
$ npm install express --save
If the process was successful, your terminal would be similar to the one below
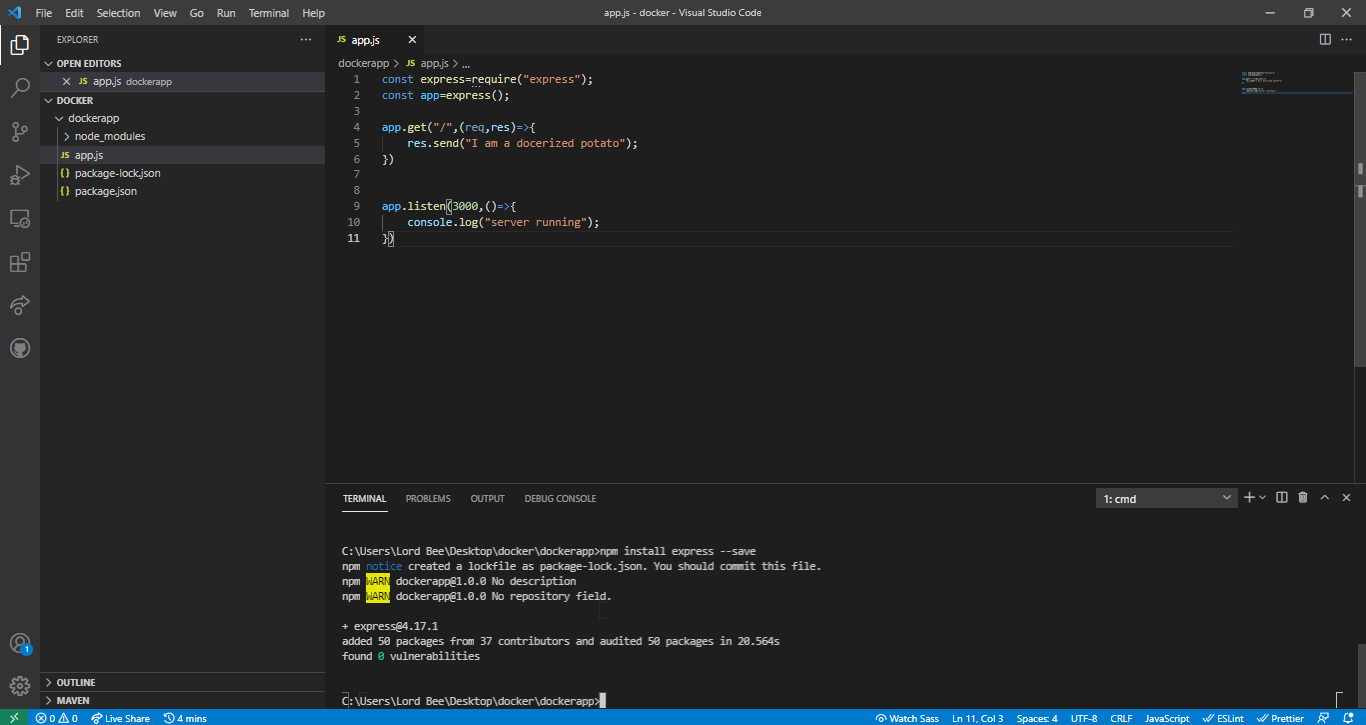
Write the Server side code
Now, we need to create the app.js file. You can copy the command below into your terminal:
$touch app.js
The app.js file would contain our server code. Copy the following code into your file:
const express=require("express");

const app=express();

app.get("/",(req,res)=>{

 res.send("I am a docerized potato");

})

// The server would listen on port 3000 in the docker container.

app.listen(3000,()=>{

 console.log("server running");

})
Your project directory should look something similar to the one below.
Add start script to the package.json
In the package.json file, add a start script that would start the server when run. It should be similar to the one below.
{

 "name": "dockerapp",

 "version": "1.0.0",

 "description": "",

 "main": "app.js",

 "scripts": {

 "start": "node app.js"

 },

 "keywords": [],

 "author": "",

 "license": "ISC",

 "dependencies": {

 "express": "^4.17.1"

 }

}
Dockerizing the Server
In dockerizing an application, the Dockerfile is very important. It contains all the instructions needed for Docker to build an image for the application, and create a container from it.
Change the directory (if need be)
The first step would be to move out of the dockerapp folder in your terminal to the working directory of the application.
If the working directory of the terminal is the dockerapp folder, you can move out of it by typing the code below in your terminal.
$cd..

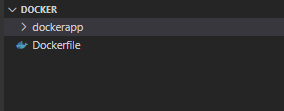
Create the Dockerfile
Next, we create the DockerFile in the directory. Copy the code below into the terminal.
$touch Dockerfile
This creates a new file called “Dockerfile”.
In writing a Docker file, like any other computer-read document, there are keywords/commands, and syntax to be followed. In writing the Dockerfile to dockerize the node server created, some of these rules are explained.
Note: “#” is used to start a comment. These are lines of text that are ignored by docker. They can be used to explain other parts of the document.
# The "FROM" command indicates where the base image for the docker image to be built, is from.
# By default it is from Docker hub
# In this case, the nodejs official image, version 14 is being pulled
FROM node:14

# The "WORKDIR" command is used to specify the working directory of the containers that would be spun from the image
WORKDIR /app

# The "COPY" command directs docker to copy the content of one folder(dockerapp) to another(app)
# In this case all the files in dockerapp would be copied to the working directory in the docker image
COPY dockerapp /app

# This specifies the command that would be run while building the new image.
# In this case we would be installing our server dependencies on top of the previous image
RUN npm install

# The "EXPOSE" command is used to indicate the port in the container that can be open to the network
EXPOSE 3000

# The "CMD" command specifies the command that would be run when a container is to be run.
# In this case, the server would be started as specified in the package.json
CMD npm start
Note: The Run and CMD commands are similar but not interchangeable. It is important to know which to use at the right time.The difference between them is their use. The instructions written in the RUN command run while building the image. It can be used multiple times. In this case, we are adding our dependencies with the “npm install” command. The CMD, on the other hand, specifies the command that should be run when a container is to be spun from an image. It can only be run once. If it appears more than once, only the last one would be executed.
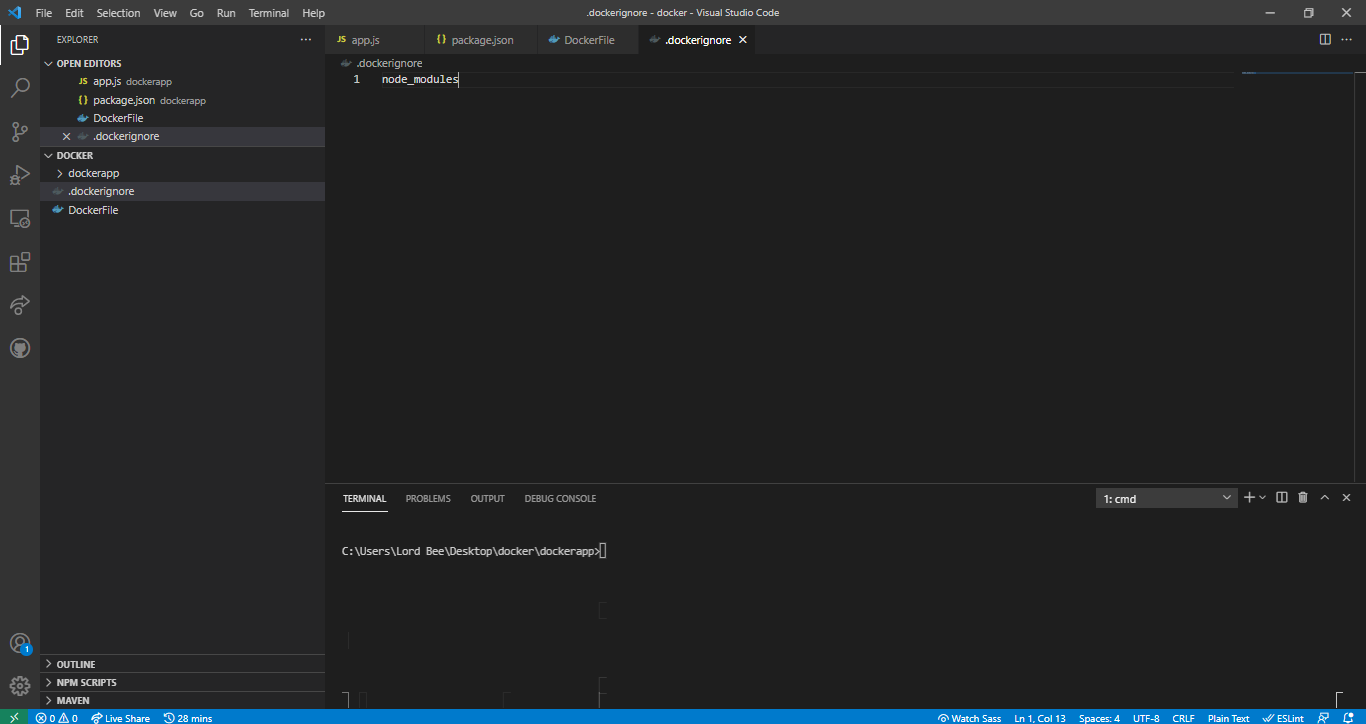
Create the .dockerignore File
The .dockerignore file is a file that specifies directories or files that should be ignored by docker while building an image. It is not compulsory, but in cases like this where we do not want to copy the node modules, it can be helpful to create the file. The file can be created by typing the below command in the terminal.
$touch .dockerignore

Inside the “.dockerignore” file, simply adding “node_modules” is enough in this case.
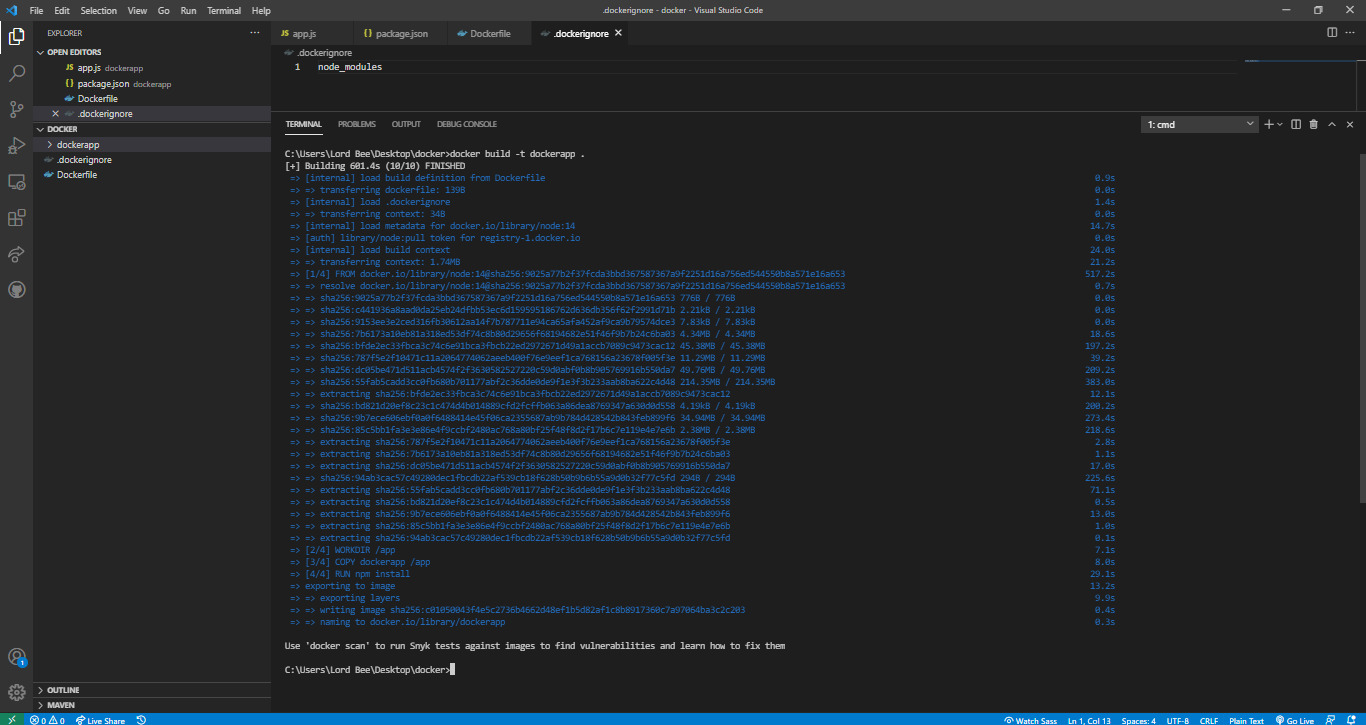
Build the Image
After writing the Dockerfile and the .dockerignore file, the next step is to build an image. The command below would build the image. Type it into your terminal.
$docker build -t dockerapp .
The build command builds an image from the Dockerfile. The -t flag is used to name the image built. In this case, the name of the image would be dockerapp. It could be anything.
Building an image could take some time.
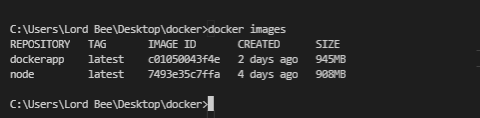
 To check the images available locally, run the command below in the terminal:
$docker images
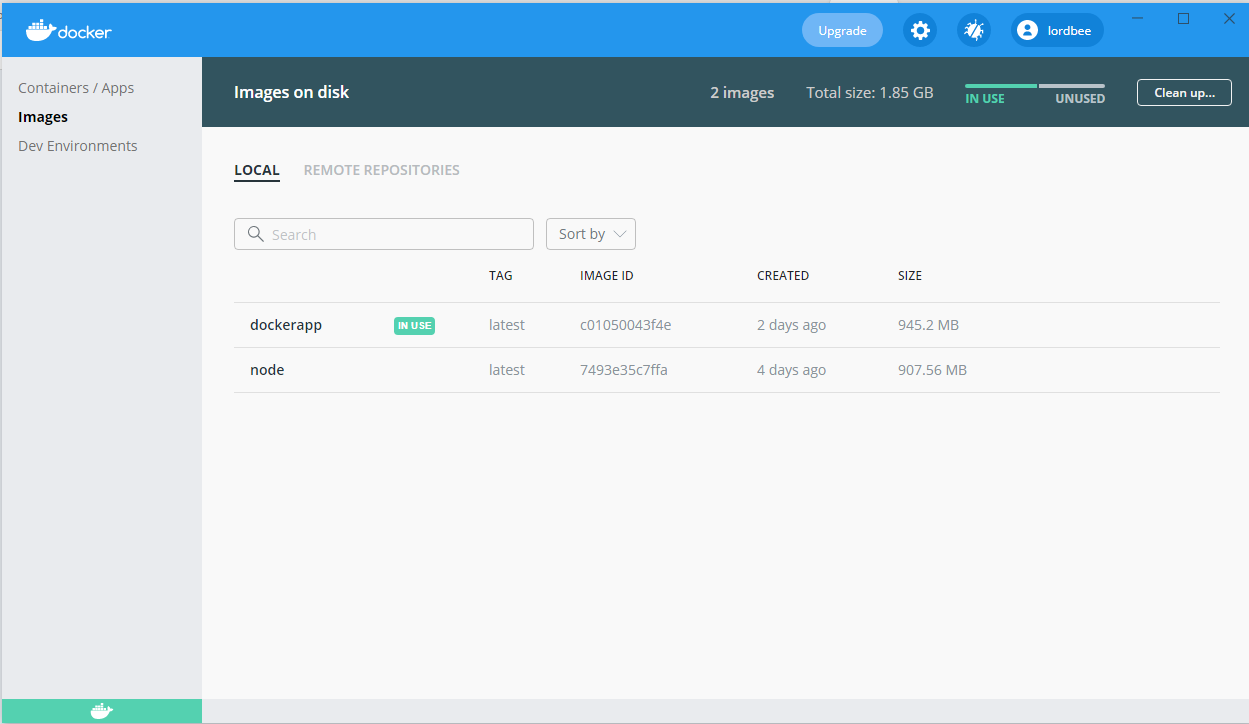
The desktop application can also be used to check the local images.
Running a Container
We can run a container by writing the command below in the terminal.
$docker run --name app1 -p 3000:3000 dockerapp
The docker run command initializes a docker container. The --name flag is used to assign a name to the container. The -p flag is used to map ports from the docker container, to the host on which it is running. In this case, we exposed the port 3000, so we would map it to the 3000 port of the local machine on which it is running. The syntax to use it is in this form:
-p hostport:dockerport.
The dockerport has to be a port that was exposed in the Dockerfile, but the hostport can be any free port on the host machine. Hence, it is possible to spin up multiple docker containers on the same host, but mapped to different ports.

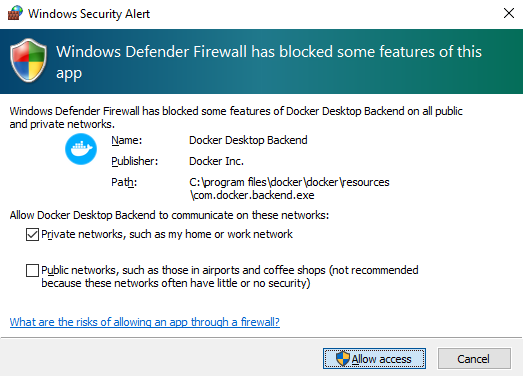
Note: A prompt might pop up asking you to allow network access, allow it.
Visit localhost:3000 in your browser to make sure the docker container is indeed running.

Running multiple Containers
As stated earlier, it is possible to spin up multiple docker containers and map them to different ports of the host. Our second container would be generated with the line below in the terminal.
$docker run --name app2 -p 3001:3000 dockerapp
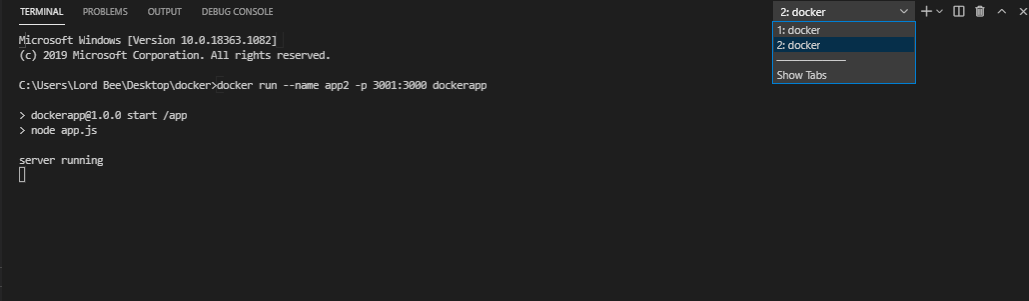
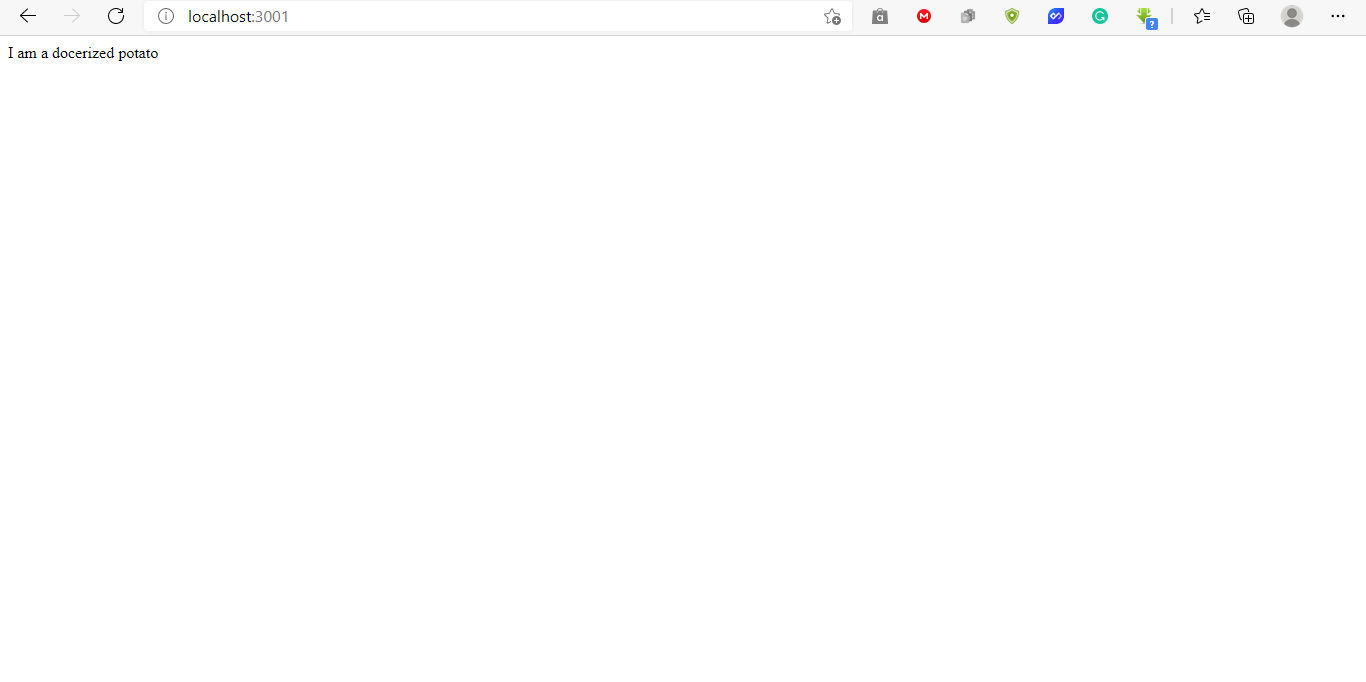
Visiting localhost:3001 in the browser would give:
Check running containers
To check the running containers, the docker command docker ps can be run in the terminal with appropriate flags. The flag -a is used to list all the containers, running or stopped.
$docker ps -a

The container ID is very important. It is needed to stop or start a container.
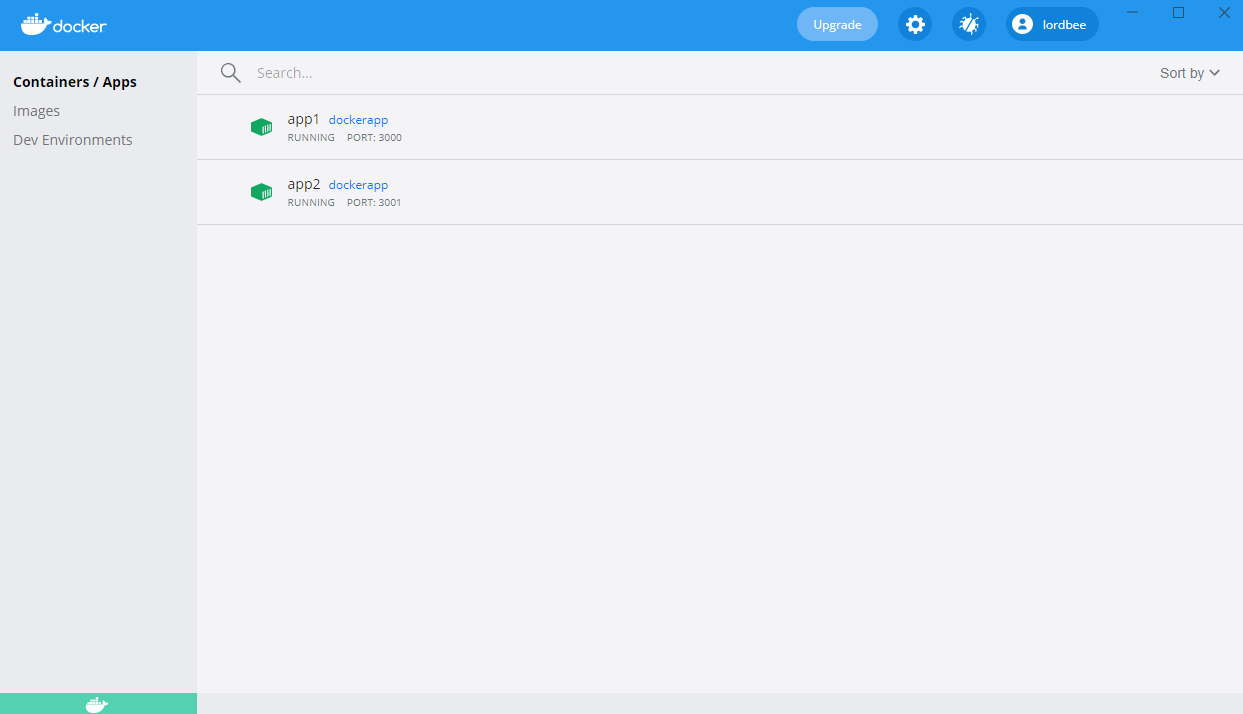
The desktop docker application can also be used to check the docker containers that are running.
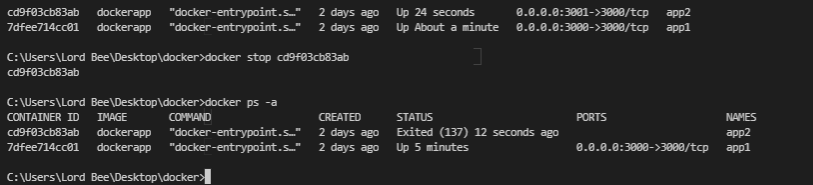
Stopping a Docker Container
The docker stop command can be used to stop a container. It is in this format
docker stop container_id
The container_id is the container ID that is allocated to each container.
Starting a Docker Container
The docker start command can be used to start a container. It is in this format:
docker start container_id
The container_id is the container ID that is allocated to each container.

Conclusion
The capability of creating multiple isolated containers while consuming minimal resources is a feature of Docker that makes it an essential tool in development. Most hosting platforms provide Docker deployment options. For those new to development, it’s never too early to get used to Docker, and I hope this article helps a bit.
To learn more about Docker, check out the official documentation here
The repo containing of the dockerized server demonstrated in this article can be found on github
If you have any questions, you can contact me on Twitter: @BoluAkinwande

